Monday, November 7, 2016

Butternut Squash Soup

This butternut squash soup is a game changer. 
It’s simple, delicious, fast, hearty, and easily modified to fit dietary restrictions.


Butternut squash soup with pan-fried salad turnips


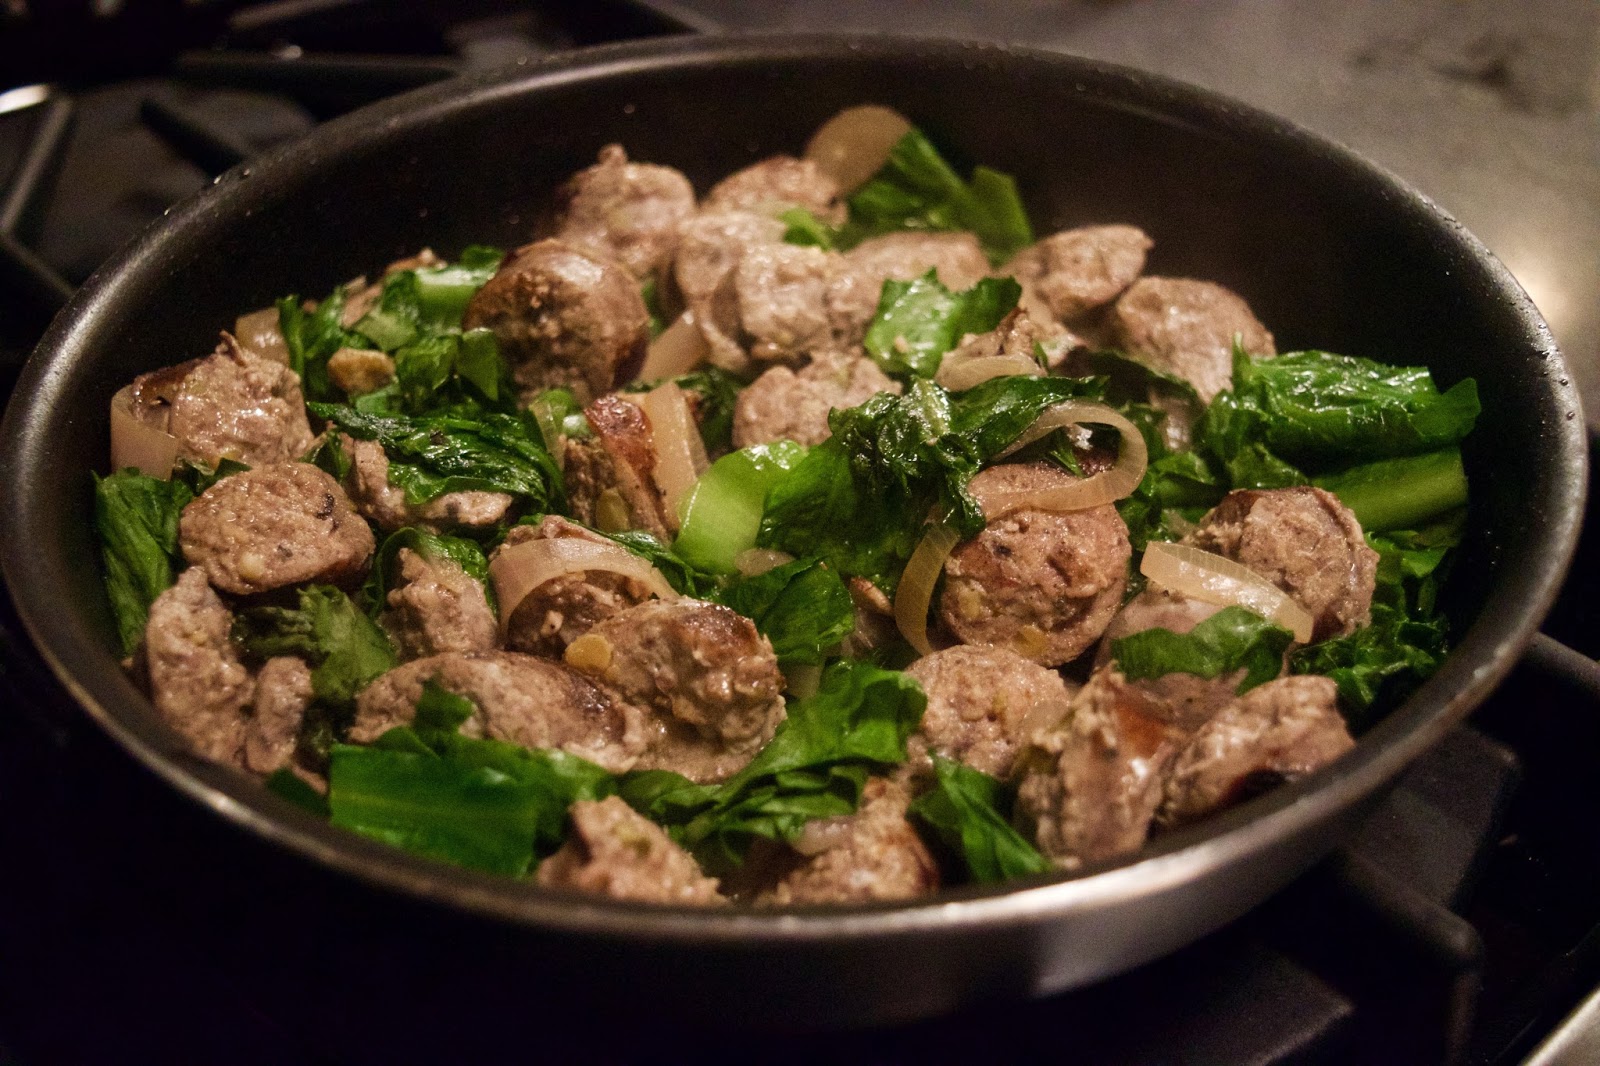
Butternut Squash Soup with pan-fried apple sausage, shallots and escarole


You will need:


2 large yellow onions
1 shallot
1 tbsp. olive oil
The flesh of 2 butternut squash
36 oz. Chicken Stock (or Vegetable stock)
1 tbsp. Garlic
1 tsp. Turmeric
1 tbsp. Ginger
1 tsp. Paprika
1 tsp. Cumin
1/2 tsp. Sage

Himalayan Salt
Pepper
Optional: Curry Powder


Cut the squash into chunks approximately 1 inch long. 
If you are in a bit of a rush, a lot of grocers are now selling butternut squash already prepared (peeled and cut).

You do not need to cook your squash before adding it to the pot.


Caramelize the onion and shallots with about 1/2 tsp. of salt in the olive oil over medium heat until almost translucent. 


Add the butternut squash chunks, spices, and the chicken stock. 
Cook for approximately 20 minutes until the squash is tender. 


Turn the heat to low, use your emulsion blender to puree the mixture; season with salt and pepper to taste. 


I like to top the soup with additional protein or sautéed vegetables in order to make it feel heartier. 

This time around, I decided to pair the soup with pan-fried apple sausage, shallots, and escarole.


Sunday, November 6, 2016

Dragon Tongue Bean Stir Fry


Crunched for time? Try this recipe. 


I kept my stir fry VERY simple with three principle ingredients, Dragon Tongue beans, Mung bean sprouts and Garlic Chives.


Dragon Tongue beans are pretty long beans, so I cut mine into 1 inch pieces. 

Turn your stove to high heat. Add 1-1 1/2 teaspoons of grape seed oil to your pan. 
Allow it to heat. Add the Dragon Tongue beans. 


Get a good sear on the beans, you'll notice that where visible, the beans will change color to a more vibrant green, this only took me a little over two minutes.  Quickly add the sprouts, sauté for maybe one more minute, add the chives, some salt and pepper, and  you're ready to serve!


Monday, October 24, 2016

Dainty Steak and Eggs


My mother is the queen of leftovers. When we were younger,  it was close to impossible to get us to eat anything if it was deemed a "leftover."  Didn't matter if it was our favorite meal in the whole world, if we saw it come out of the refrigerator or go into a tupperware, there would be a mini-mutiny. 

So, my mother became an expert at hiding the leftovers in plain sight. As long as they were presented in a slightly modified way, there was little resistance in getting us to eat. For the purposes of this blog, I've designated them "Dinner Deux."  Anytime a recipe is tagged with that, you will know that it incorporates leftovers of some kind. 

Fast forward to yesterday... 

 I have these great tiny containers that allow me to store/freeze individually portioned amounts of proteins. I had a ridiculous craving for the skirt steak I made the other day.  I defrosted the steak, whipped up some fluffy yellow scramble, and topped it off with garlic chives from the Union Square Market. 

Voilà! 

You then have a quick healthy breakfast, lunch, or dinner, that doesn't look like the same thing you had last week. 


Wednesday, October 19, 2016

Skirt Steak Salad


The other day my brother and I were absolutely starving. 
We decided to order some takeout because it would take "too long" for us to cook something. While we were waiting for our food, I decided to make some skirt steak to pack for my lunch.

About 45 minutes later as I was just finishing up we realized that the order never went through. 
So, we decided to have some of the steak, pulled together a salad and the dressing with some things I had in the fridge. 

Salad: 
Arugula 
Sanditas [otherwise known as the Mexican Sour Gherkin Cucumber]
1 cup of leftover spaghetti squash (well shredded)


Dressing: 
Juice of one Lemon
Grated Garlic 
Grated Turmeric
Grated Ginger
Grape Seed Oil 
 Red Pepper Flakes 
Salt & Pepper to taste


Steak Marinade: 
Apple Cider Vinegar
Grated Garlic 
Grated Turmeric
Grated Ginger
Salt


I purchased both the pea and sunflower shoots, sanditas, and nasturtium from the Union Square Market.


In case you were curious the wine is the Divining Rod Cabernet Sauvignon
I'm pretty picky about my reds and this is absolutely delicious, I HIGHLY recommend it. 


Tuesday, October 18, 2016

The Pump-, the -kin, the legend... Batmouth


Batmouth. 

Over the weekend I went up to New England to visit my friend D, and she taught me how to make roasted pumpkin seeds! 

I've never made roasted pumpkin seeds before, in our household the primary concern when carving pumpkins was the swashbuckling tendencies of us hooligans. 

Without fail, every year peaceful pumpkin carving would turn into a pirate battle, or a battle reenactment, usually of the Ninja Turtle variety. Battle lines would be drawn, parents would intervene and the fight would result in a draw due to authority intervention... I still maintain we would have won.  

Regardless, the last thing our parents wanted to do was involve any heating element into that melee so I was super excited to try making them. 


D's pumpkin seed recipe:

-Preheat oven to 400 degrees F- 

1. Remove seeds, rinse, and pat dry.
2. Arrange seeds on an oil coated  (1-2 tablespoons) or Pam sprayed baking pan
3. Season with salt 
4. Bake until seeds are golden brown, check/shake the seeds around every 10 minutes or so to prevent burning and assure that they cook evenly


The white pumpkin had a sweeter aroma than the orange pumpkin and smelled distinctly of honeydew melon.


Meet Batmouth's best buddy... isn't he precious?


D allowed me to fiddle with the seasonings. The only thing I would do differently is I would allow the seeds to cook almost all the way through (85%) before I added the seasoning next time. 

Spices: 
1/4 tsp garlic powder
1/4 tsp of chili powder
1/2 tsp paprika 
1/2 tsp of parsley 
1/4 tsp of thyme 

Pumpkin seeds pre-baking


So delicious! 

Roasted Pumpkin Seeds


Monday, October 17, 2016

October means Thackery Binx


We're more than halfway through October and that means Halloween Movie Marathons. Or, if you are terrified of your own shadow like me, an annual viewing of Hocus Pocus. That's about as "scary" as I can handle.

Any proper movie night will need blankets, comfy seats, and most importantly snacks! While there is a veritable universe of snacks available these days my favorite above all others is popcorn.

Let me put it this way; if October means Thackery Binx, movie night means popcorn. 


I like to make my popcorn on the stove top. It gives me a greater degree of control over not only the flavor, but also helps to assure that I will be eating better quality, more natural, ingredients.


When I tried to capture the correct ratios I had a surprisingly hard time figuring out how to share them with you guys.  I just kept eyeballing the amounts and adjusting them.

 So, I found a great guide by Simply Recipes which you can access here. 

My favorite thing about pot-popping popcorn,  is the variety of ways you can flavor the popcorn. 

Some of my favorite combinations are : 
Traditional butter with Himalayan salt
Truffle
Rosemary Garlic
Rosemary Parmesan
Cinnamon Sugar
Spicy Maple 
 Cheesy Garlic
S'mores

Use your imagination, the sky is the limit... 

An easy way to get creative with your popcorn is to try different flavored salts like this one from my trip to Iceland 


I had a couple of questions about where I bought me pepper flake Weck tulip jar; I purchased it at the Charles Street Black Ink in Boston but I'm sure you can buy them online. 


Blueberry salt from my trip to Iceland gave a very subtle tang to the popcorn

Can we also just take a second to appreciate the amazing greatness that is Batmouth? 
I'll give him his proper attention in an upcoming post... 


If the movie starts to get a little too terrifically terrifying, follow these fool proof Halloween movie watching methods:

1. Hide under the covers.
2. Climb on top of the person next to you and bury your head in their shoulder.
3. Stick your fingers in your ears and shut your eyes.
4. Excuse yourself to go to the bathroom .
5. Turn off the movie and put on a Christmas movie. 
[It's a fair suggestion, some of the stores around here are already decorating!]

 If nothing else, remember, it's just a bunch of Hocus Pocus.

Boo,


Monday, October 10, 2016

Broccoli Rabe and Jerusalem Artichoke


In this post we're going to cook two vegetable sides, one way. 

Walking around the Greenmarket some of the stalls will show you how to cook ingredients that might otherwise be intimidating. Enter Jerusalem Artichokes. I've often been tempted to try them but wasn't really sure where to start. Fortunately I was able to try them a while ago and have been hooked ever since. 


 Remember to wash all of your ingredients thoroughly. 

Ingredients: 
Fresh turmeric 
"Wild" onions - though you can substitute with scallions or green onions
Jerusalem Artichokes 
 Broccoli Rabe 
Salt and Pepper


Prep: Thoroughly wash your onions and chop the entire plant into pieces no larger than a half inch. I also trimmed off the roots at the bulb. This is not necessary as they are edible, I however am not a fan of their texture. 


Thoroughly wash your turmeric. For ease of handling I cut mine in half before grating it. 
Watch out though this stuff stains your fingers


Add a little vegetable oil (I used grape seed) or olive oil to your pan and add the onions. 
Cook for about 2-3 minutes. 


During my trip to France earlier this year I became obsessed with these Tefal pots and pans that have detachable handles. In an apartment where storage space is a premium these are a lifesaver.


After much internet sleuthing, I was able to find them online. 
My life has been forever improved. 


After allowing the onions to cook, grate in the turmeric. 


Give it a quick stir


Add either the broccoli rabe or the quartered jerusalem artichoke. 

For Jerusalem Artichoke:
Prep: Wash and quarter your Jerusalem Artichokes, you want them to be around the same size so that they cook evenly. 

Sauté the Jerusalem Artichoke for about ten minutes  over medium/high heat or until it becomes golden brown and begins to soften. 
Salt and pepper to taste. 


For Broccoli Rabe: 

DO NOT LET THIS GET SOGGY 

Prep: Blanch the broccoli rabe in boiling salted water quickly. 
We're talking one minute of cooking time in the boiling water and then immediately transferring into a bowl of ice water. Pat dry with a paper towel. 

Your broccoli rabe is now cooked. 

Add the cooked broccoli rabe to the onions and turmeric for 2-3 minutes, enough to heat and season the broccoli rabe. 

Salt and pepper to taste. 


These "sides" are hearty enough to serve as main dishes if you're a vegetarian you can easily add quinoa or beans, or if you are an unabashed carnivore who is trying to up his or her veggie intake, I suggest either jerk chicken or cut up skirt steak. 

 I like to add a little dried hot pepper to the broccoli rabe for some kick.